CONSULTATION » Decking boards » clips
Building instructions BioMaderas Clips
The concealed fastening has technical advantages compared to a visible screw connection. There are different systems on the market. For a concealed fastening of particularly hard decking boards, we recommend the proven and tested system BioMaderas Clips stainless steel or BioMaderas Clips composite .
Video BioMaderas Clips
Watch our short video on installing a wooden deck BioMaderas clips on. Below you will find the building instructions with text and pictures.
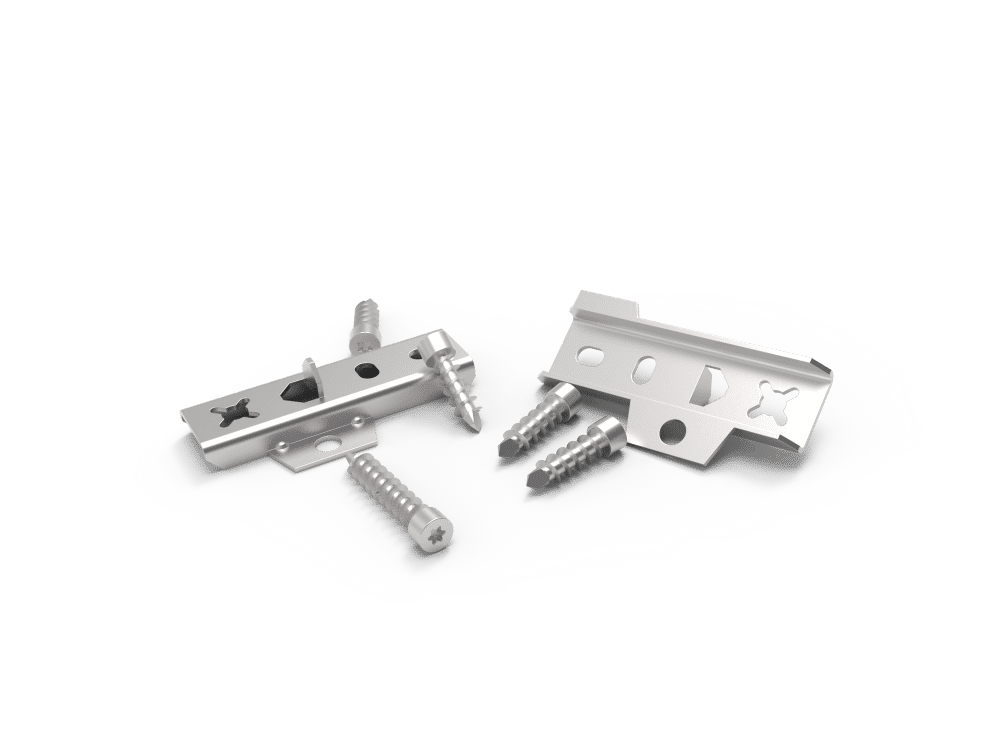
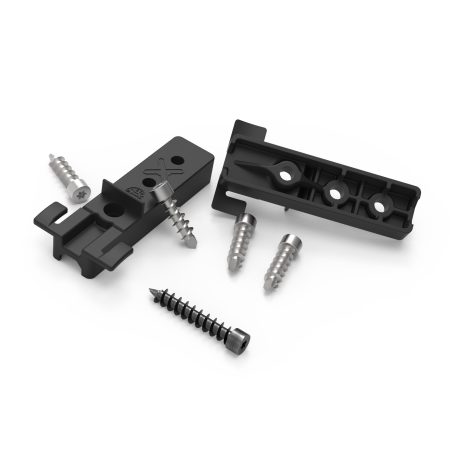
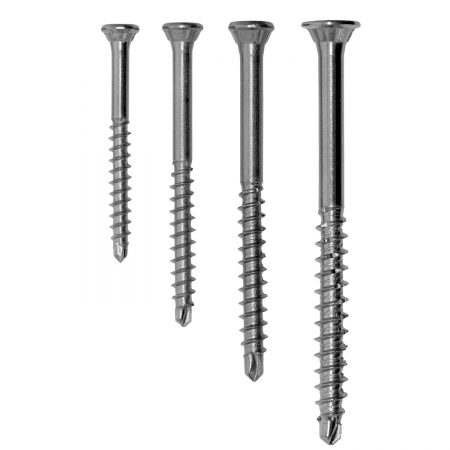
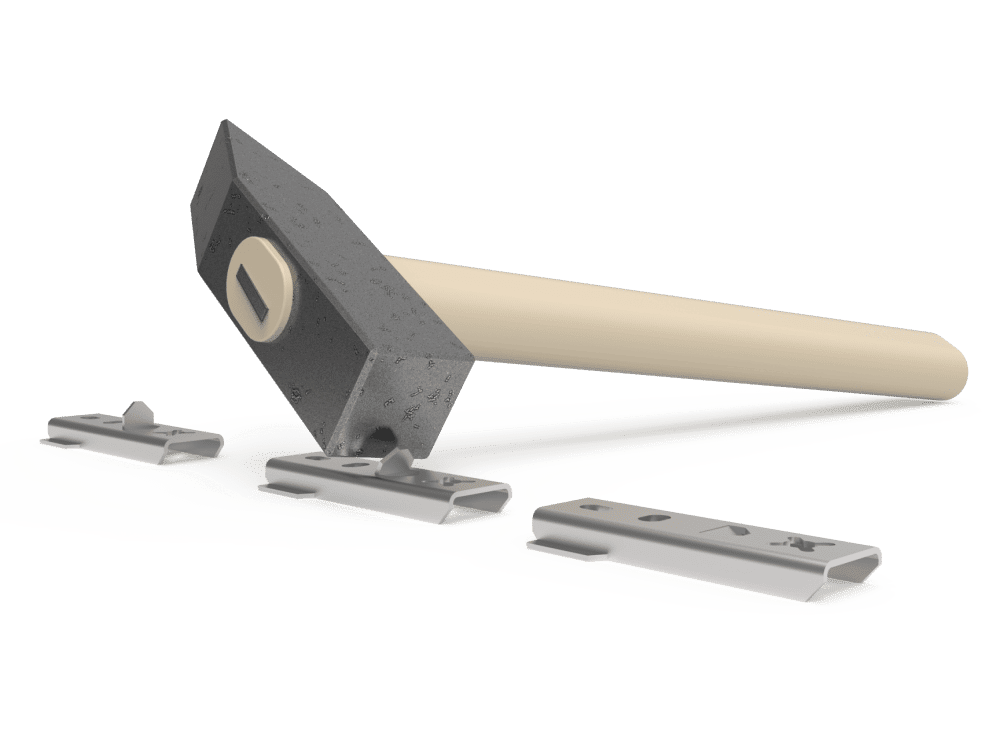
1. Clips and screws
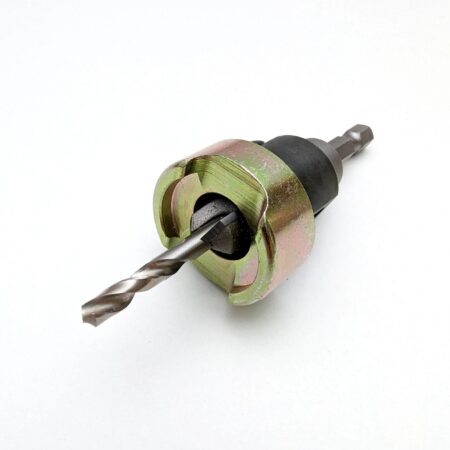
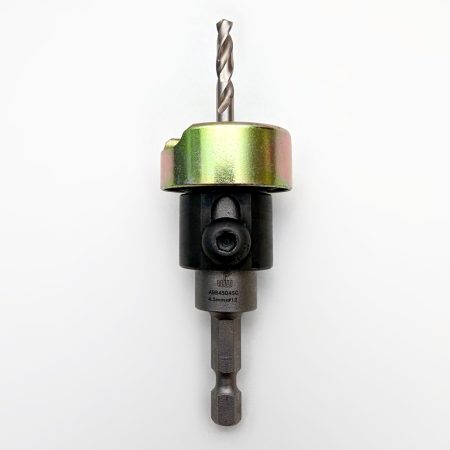
You need two for each intersection of decking/substructure BioMaderas Clips, four shorter screws to attach the clips to the underside of the decking board and one longer screw to attach a clip to the substructure. Use a stainless steel bit to prevent oxidation spots on the planks.
2. Screw the clip onto the decking board
Turn the decking board upside down and attach the clips to the underside of the decking board, slightly offset.
The clip, which is later screwed into the substructure, must always be attached to the decking in the position that will later cross the substructure. This is not necessary for the clip, which is pushed under the row of floorboards that have already been laid. However, the clip that is pushed under should not be more than three centimeters away from the next substructure.
Screw the clips to the underside of the decking board using two of the shorter screws each. The screws are self-drilling and do not necessarily need to be pre-drilled. With very hard wood, however, you can significantly reduce bit wear by pre-drilling.

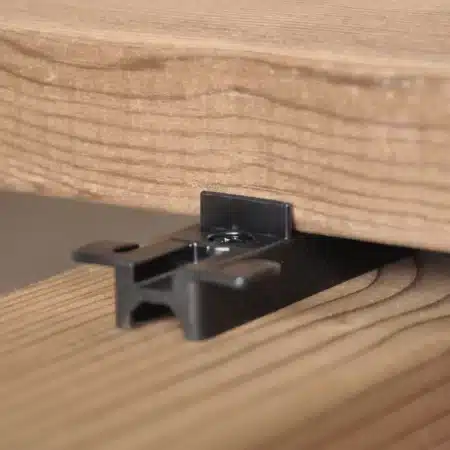
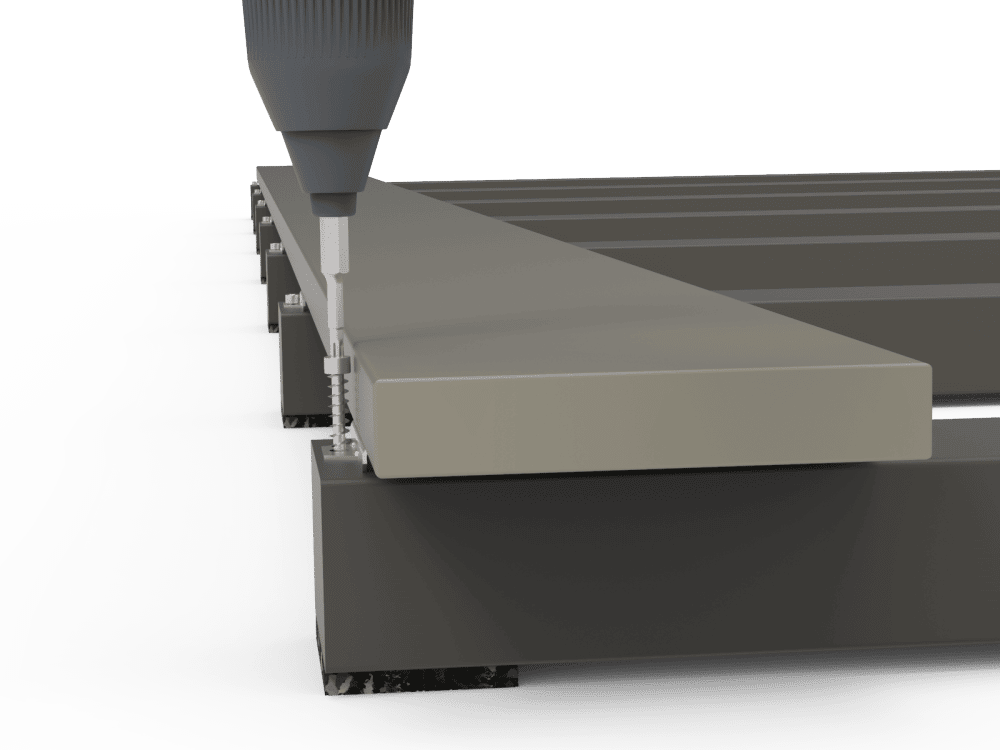
3. Push clips under fixed board
Turn the decking board face up and slide the clip under the row of boards already attached. The clip that is pushed under the row of planks does not necessarily have to be on a substructure, but can also be close (at a maximum distance of 3 cm) next to the substructure. Caution: This clip is not screwed into the substructure.
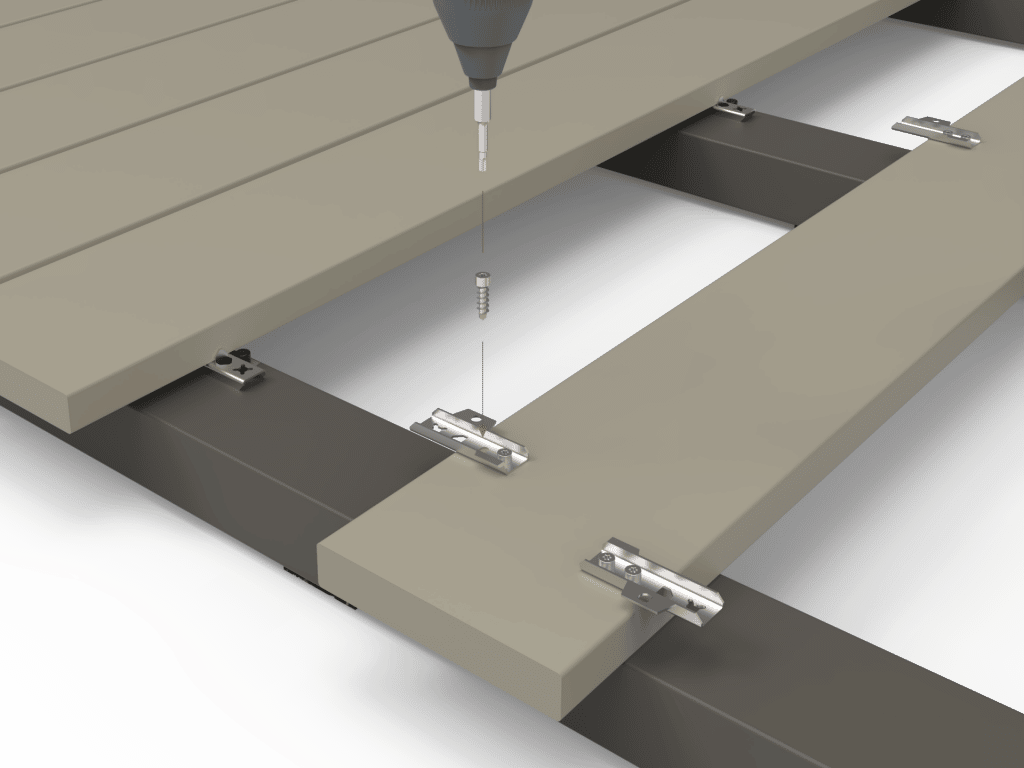
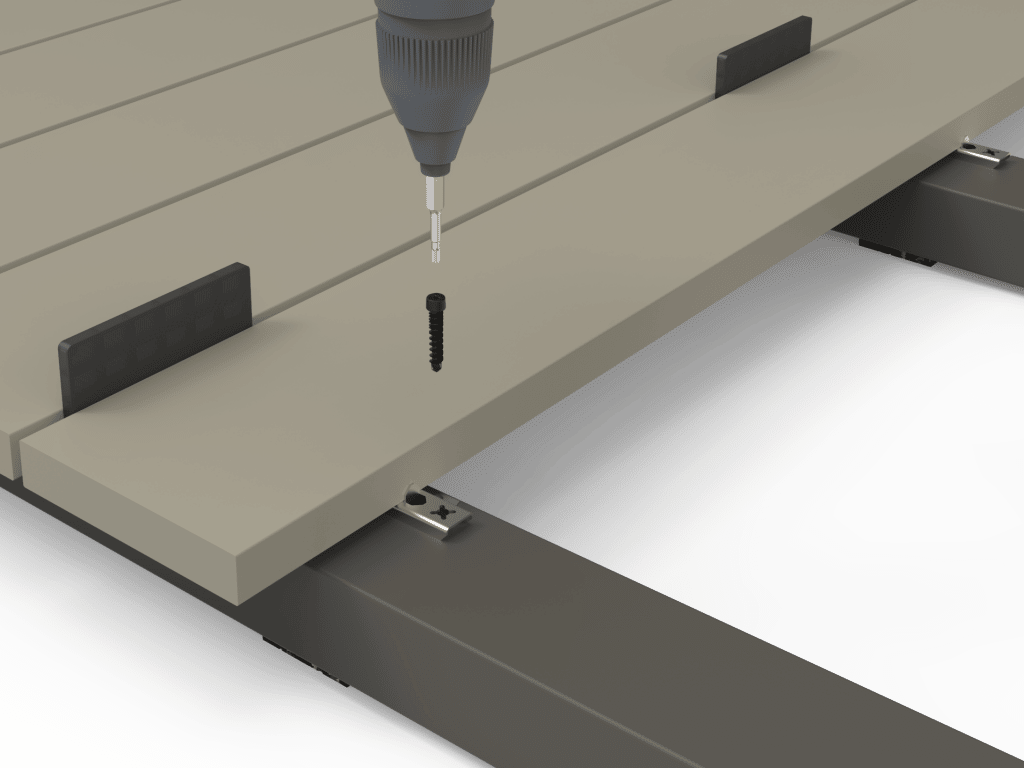
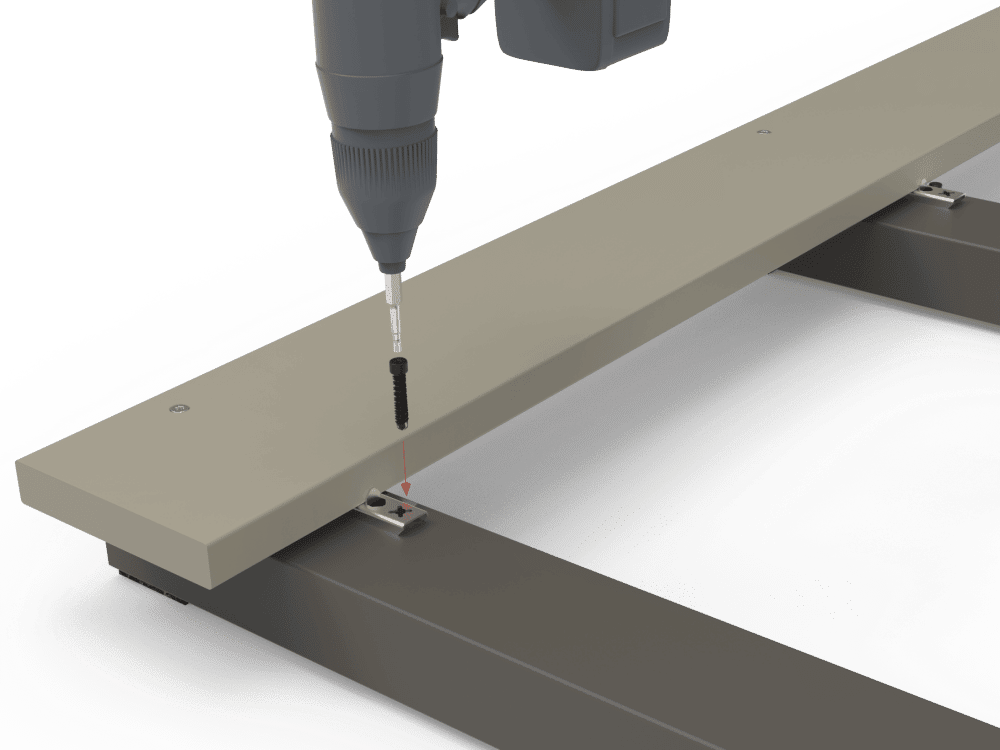
4. Screw the clip onto the substructure
The decking board is now inserted with a clip under the row of boards that have already been fastened. The other clip lies open on the substructure. This must now be screwed into the substructure with the longer stainless steel screw. The substructure for the screw hole must be pre-drilled here. Repeat this and the previous steps until the terrace area is completely covered with decking boards.
5. Fasten first and last board
A connection of the first and last board on the substructure is included in the concealed screw connection BioMaderas Clips possible in two ways. For both variants, the stop mandrel must be hammered in with one stainless steel clip per screw connection point. For the composite clips, the clip is shortened.
6. Fasten the first board in a concealed manner
Screw a clip parallel to the floorboard on the underside of the floorboard so that the eyelet for the substructure screw looks out to the side. To do this, the stop mandrel of the clip must be bent. With the composite clips, the clip is shortened just behind the hole for the substructure screw. With this variant, the substructure must protrude at least 8 millimeters under the decking. The eyelet must be accessible for screwing in and must not be blocked by a solid structure (e.g. house wall).
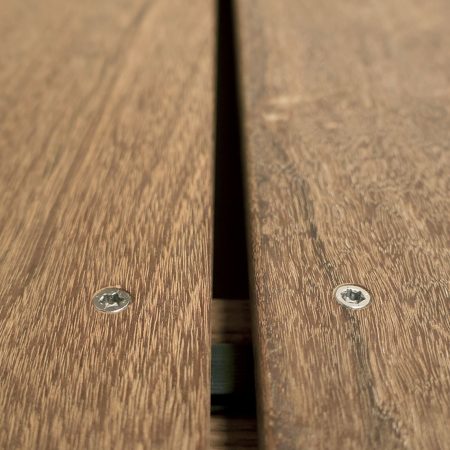
7. Fasten the first board visibly
With this variant, use a visible stainless steel decking screw for each intersection of the substructure with the decking board to fasten the first and last row of decking. In order to maintain a distance between the floorboard and the substructure, a clip must also be screwed under the floorboard over the entire surface in this variant. The decking screw is screwed through the floorboard into the substructure at a distance of 1,5cm to 2,5cm from the edge of the decking with pre-drilling.
Video of fixing the first board
In this video you can see how to fasten the first board in the system of BioMaderas Clips stainless steel succeeds.
Video on replacing planks after installation
You can also remove a plank from the middle of the terrace with a joint spacing of at least 6mm if you not only loosen the plank in question but also 3 to 4 neighboring planks and push them into each other like an accordion. The screws in the joint are loosened with a 50mm long Torx 20 bit.
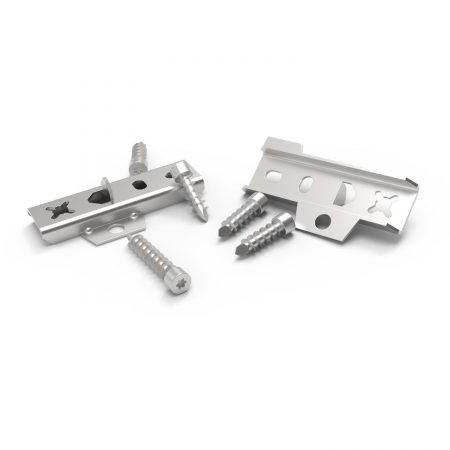
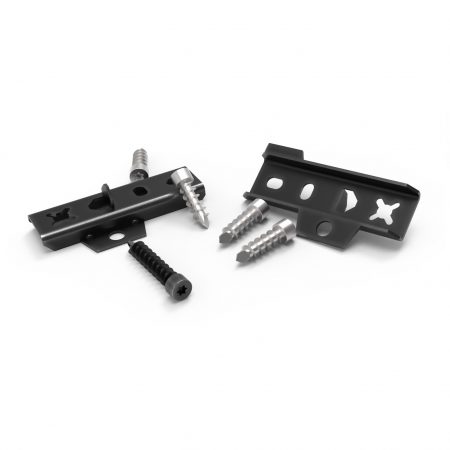


Table of Contents
process
calculate demand
calculate costs
Order wood samples
Wood decking shipping
interim storage
Building instructions wooden terrace
grocery list
Prepare the subsurface
meadow or earth
stone or concrete
roof or balcony
hillside
Lay out the foundation
Establish height compensation
Lay the substructure
Install decking
Select saw blade
Screw the decking boards together
Building instructions terrace screws
Assembly instruction clips
Fade wooden terrace
build stairs
Decking boards crooked
Typical mistakes
Care for
Clean
Enjoy
Decking quality
Best decking wood
Wood species comparison
hand sorting
cracks and curvature
Durability wooden deck
Wood vs Aluminum
Concealed screw connection comparison
branded products
finger joint